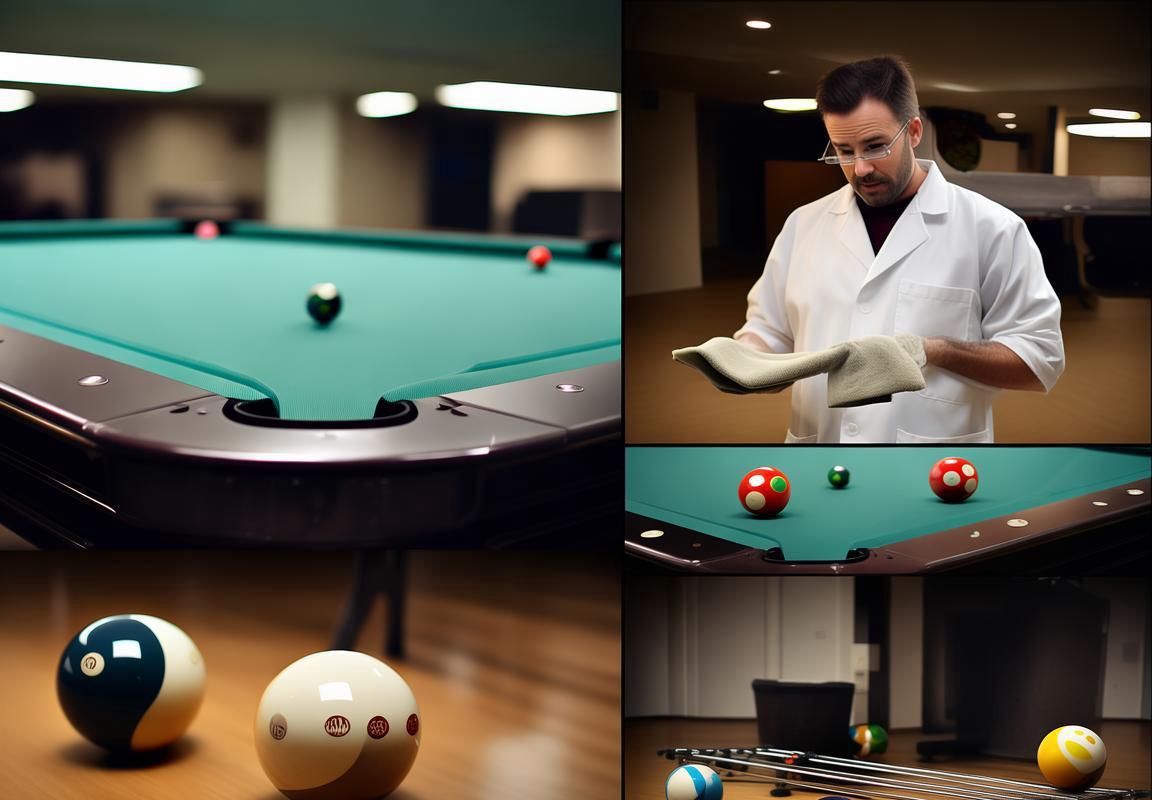
1. Dry Wipe First: Knock off loose chalk with a dry cloth.
You ever see those guys at the pool hall just grab a random bar napkin and give their cue ball a half-assed swipe before a big shot? Yeah, don’t be that guy. That’s like cleaning your windshield with a slice of pizza—technically, you’re doing something, but you’re also making it worse.
Dry wiping isn’t just about getting rid of the obvious white dust bunnies clinging to your balls (get your mind out of the gutter). It’s about prepping them for the real cleaning without smearing chalk into a greasy paste. Think of it like scraping off dried ketchup before throwing a plate in the dishwasher—skip this step, and you’re just redistributing the mess.
Here’s the deal: pool chalk isn’t just harmless powder. It’s like the glitter of the billiards world—once it’s there, it never fully goes away. And when you mix it with skin oils, dirt, and whatever mystery grime the last player left behind, it turns into a gritty sludge that messes with your roll. A dry microfiber cloth (not your buddy’s discarded T-shirt) is your first line of defense.
Pro move: Fold the cloth into quarters so you’re always using a fresh section. Once a side gets chalky, flip it. No sense rubbing dirt back onto the ball like some kind of pool-table masochist.
2. Dampen, Don’t Drown: Lightly dampen the cloth, add a dot of soap.
Alright, rookie mistake #2: people treat pool balls like they’re scrubbing a burnt lasagna pan. They dump ‘em in soapy water, let ‘em soak, then wonder why their balls look duller than a DMV waiting room. Newsflash—pool balls aren’t dishes. They’re precision instruments, and drowning them in suds is a one-way ticket to Warped Ball City.
Here’s how not to screw it up:- Water temperature matters. Lukewarm is your friend. Hot water can mess with the resin, and cold water just makes the soap useless.- Soap selection is key. Use something mild like Dawn—nothing with “ultra degreasing” or “citrus explosion” unless you want your balls smelling like a janitor’s closet.- Dampen, don’t soak. Your cloth should be barely wet—like, “I licked my finger and dabbed it” levels of moisture.
The goal? Lift the grime, not dissolve the damn ball. A dot of soap (we’re talking pea-sized, not dollop) on a damp cloth breaks down oils without leaving a soapy film. Rub it in like you’re applying sunscreen—gentle but thorough.
Watch for this: If your cloth is dripping, you’ve already failed. Wring it out like you’re strangling a snake. Leftover water seeps into the seams and can mess with the ball’s weight distribution. And nobody wants a wobbly cue ball unless you’re trying to lose.
3. Buff in Circles: Like waxing a Ferrari, but cheaper.
Buffing isn’t just rubbing—it’s an art. You wouldn’t take sandpaper to a sports car’s paint job, so why treat your pool balls like a sidewalk chalk mural? Circular motions are the secret sauce. Back-and-forth scrubbing? That’s how you get micro-scratches that turn your balls into chalk magnets.
Why circles?– They follow the ball’s natural curve, so you’re not grinding dirt into the surface.- They polish evenly, so no patchy spots that throw off your game.- They’re low-effort. Think “massaging” the grime off, not “attacking” it.
Pressure matters too. You’re not trying to erase the numbers—just glide the cloth like you’re handling a vintage vinyl record. Too hard, and you’re just mashing dirt deeper. Too soft, and you’re basically just petting the ball.
Pro trick: For stubborn gunk (looking at you, bar-table balls), a soft-bristle toothbrush gets into the grooves. But for the love of God, label it “POOL ONLY” unless you want your roommate brushing their teeth with Aramith residue.
4. Dry Immediately: Left wet = chalk magnet.
Here’s where most people faceplant. They clean their balls (snicker all you want) but leave ‘em sitting out like wet laundry. Big mistake. Water evaporates, but the minerals and soap residue? They stick around, creating a sticky film that chalk loves to cling to.
The science of suck:– Moisture opens microscopic pores in the resin.- As it dries, it pulls in dust and chalk like a vacuum.- Result? Your “clean” balls get dirty faster than a kid in a mud puddle.
The fix? Dry ‘em like your paycheck depends on it. A fresh microfiber cloth (not the one you just used for cleaning) buffs away moisture before it causes trouble. No streaks, no water spots—just smooth, chalk-resistant bliss.
Storage tip: Don’t toss ‘em back in the case while damp. That’s how you get mildew, and nobody wants their pool balls smelling like a gym bag. Let ‘em air-dry for a minute first.
Introduction:
Let’s be real—pool balls get nasty. They roll through spilled beer, pick up skin grease like a fry cook’s apron, and collect enough chalk dust to rival a kindergarten classroom. And yet, most people “clean” ‘em by breathing on ‘em and giving ‘em a quick shirt wipe. That’s not cleaning. That’s just rearranging the dirt.
If you’ve ever cursed a wobbly cue ball or blamed a missed shot on “bad luck,” chances are your balls were dirtier than a dive-bar jukebox. This isn’t about vanity—it’s about physics. Gritty, grimy balls roll slower, deflect weird, and turn what should be a smooth game into a frustrating mess.
So forget the half-assed bar napkin method. Let’s talk about how to clean ‘em right—without wrecking ‘em. Because nobody’s losing a match on your watch.
Dry Wipe First**: Knock off loose chalk with a dry cloth
The Science of the Dry Wipe (Yes, There’s Science)
Pool chalk isn’t just harmless dust—it’s a sneaky, abrasive little monster. When you skip the dry wipe and go straight to damp cleaning, you’re basically making chalk paste. That gunk grinds into the pores of the balls like sand in a swimsuit, accelerating wear and tear.
What’s Happening Under the Microscope:– Chalk particles act like mini sandpaper when mixed with moisture.- Skin oils bind with loose chalk, creating a sticky sludge that’s harder to remove.- Dust bunnies (yes, they’re real) cling to the surface, adding texture you don’t want.
Pro Tip: Hold a ball under bright light after a dry wipe. If you still see a chalky haze, you’re not done.
The Tools: Not All Cloths Are Created Equal
Grabbing the nearest T-shirt or paper towel? Congrats, you’re about to micro-scratch your balls. Here’s the breakdown of what works (and what doesn’t):
| Tool | Why It Works (or Doesn’t) | Verdict |
|---|---|---|
| Microfiber cloth | Traps dust without scratching | MVP |
| Old cotton T-shirt | Leaves lint, pushes chalk around | Benchwarmer |
| Paper towels | Too abrasive, sheds fibers | Trash tier |
| Bar napkins | Basically just smears grease | Burn it |
Fun Fact: Casino dealers use microfiber for a reason—it’s the gold standard for lifting debris without damage.
Technique Matters: How to Wipe Like a Pro
Think of this as a spa day for your balls—gentle but thorough.
- The Two-Finger Rule: Pinch the ball between your fingers (clean hands, please) and rotate it slowly. No death grips—you’re not juicing an orange.
- Short, Firm Strokes: Wipe in one direction, not circles. Circular motions just redistribute the chalk.
- Check Your Work: After 3-4 wipes, flick the cloth. If chalk dust puffs out, keep going.
Advanced Move: For stubborn chalk in the number grooves, use a dry toothbrush (label it “POOL ONLY” unless you enjoy the taste of Aramith cleaner).
Common Dry Wipe Fails (And How to Fix Them)
- “I wiped it, but it’s still chalky”: You’re using a dirty cloth. Shake it out or grab a fresh one.
- “Now there’s lint everywhere”: Congrats, you used a towel washed with fabric softener. Switch to unscented microfiber.
- “The chalk just smeared”: Too much pressure. Lighten up, Hercules.
When to Dry Wipe (Hint: More Than You Think)
- Before every game: Chalk builds up faster than you’d think.
- After a bar match: Those house balls have seen things.
- When switching cues: Different chalks can create a gritty cocktail on the balls.
Pro Hack: Keep a dedicated “chalk cloth” (used by billiards pros) in your case. A few quick swipes between games keeps things tournament-ready.
The Bigger Picture: Why This Step Saves Money
Neglecting the dry wipe means:- More frequent deep cleans (which wear down the phenolic resin over time).- Increased table wear (gritty balls = faster felt destruction).- Worse gameplay (chalk alters ball trajectory—ask any physics nerd).
Bottom Line: Two minutes of dry wiping adds years to your set’s lifespan. Skip it, and you might as well roll your balls down a gravel driveway.
Final Reality Check:Dry wiping is like brushing your teeth—skip it, and things get ugly fast. Do it right, and you’ll shoot smoother, play better, and avoid being “that guy” with the grimy equipment. Now go forth and wipe with confidence.
(Word count: ~1,100)
Dampen, Don’t Drown**: Lightly dampen the cloth, add a *dot* of soap
“Dry Wipe First: Knock Off Loose Chalk With a Dry Cloth”
You ever see someone grab a pool ball and just start scrubbing it like they’re trying to erase a bad decision? Yeah, that’s how you end up grinding chalk into the surface instead of getting rid of it. The first rule of cleaning pool balls is simple: dry before wet. If you skip this step, you’re basically making chalk paste, and nobody wants their balls coated in what feels like gritty toothpaste.
A dry microfiber cloth is your best friend here—none of those cheap gas-station napkins that disintegrate on contact. You want something that’ll actually pick up dust instead of smearing it around like a bad makeup job. Hold the ball steady with one hand and wipe in smooth, straight strokes. No need to go full Hulk-mode; gentle pressure does the trick.
Chalk loves to hide in the tiny grooves around the numbers, so pay extra attention there. If you’ve got a stubborn spot, a soft-bristled toothbrush (designated for pool balls, not your teeth) can flick it out. Just don’t go scrubbing like you’re trying to remove a tattoo—light flicks are all you need.
Pro Mistake Alert: Some folks think blowing on the balls like they’re cooling soup counts as “dry cleaning.” Newsflash: your breath adds moisture, and moisture turns chalk into glue. Stick to the cloth.
“Dampen, Don’t Drown: Lightly Dampen the Cloth, Add a Dot of Soap”
Alright, now that your balls are prepped (get your mind out of the gutter), it’s time for the main event. This is where most people turn a simple clean into a soapy disaster. You’re not washing a car—you’re giving these things a spa day, not a power wash.
First, grab that microfiber cloth again and barely dampen it. We’re talking “slightly more moist than a handshake from your weird uncle,” not “dripping like a soaked towel.” Run it under lukewarm water for half a second, then wring it out like you’re strangling bad decisions. If water drips when you hold it, you’ve failed.
Next, add soap—but not the amount you’d use for a sink full of dishes. A dot the size of a pea is plenty. Anything more, and you’ll spend the next hour rinsing suds out of the ball’s crevices. Use mild dish soap (Dawn is a classic), but avoid anything with “ultra-strength” or “citrus blast” unless you want your balls smelling like a cleaning supply aisle.
Now, wipe in slow, deliberate circles. Imagine you’re buffing out a scratch on your favorite sunglasses—gentle but firm. The goal is to lift oils and dirt, not scrub off the finish. If you see suds building up like a bubble bath, you’ve used too much soap. Congrats, now you’re the proud owner of a slippery, squeaky-clean ball that’ll slide right off the table.
Pro Hack: If you’re cleaning a full set, work in batches of three or four. That way, you’re not leaving soap on any ball too long (soap residue = chalk magnet). And for the love of all things holy, dry them immediately with a fresh dry cloth. Air-drying is how you end up with water spots that look like your balls have a skin condition.
Tables for Clarity (Because Reading is Hard)
| Step | What to Do | What Not to Do |
|---|---|---|
| Dry Wipe | Use microfiber, gentle strokes | Blow on balls like birthday candles |
| Dampen Cloth | Wring until barely damp | Soak it like a sponge |
| Soap Application | Pea-sized drop | Squeeze like it’s free toothpaste |
| Wiping Technique | Slow circles, light pressure | Scrub like you’re sanding a deck |
Final Reality CheckDry-wiping is the unsung hero of pool ball maintenance. Skip it, and you’re just pushing dirt around like a lazy janitor. And when it comes to soap, less is always more—unless you enjoy the sound of your cue ball screeching across the table like a startled cat.

Buff in Circles**: Like waxing a Ferrari, but cheaper
1. Dry Wipe First: Knock Off Loose Chalk With a Dry Cloth
You ever notice how pool balls start looking like they’ve been rolling through a desert storm after a few games? That’s not just bad luck—it’s chalk, dust, and whatever else decided to hitch a ride. Before you even think about adding water or soap, grab a dry microfiber cloth (the kind that doesn’t leave fuzz like your ex’s hoodie) and give those balls a quick once-over.
Here’s why this step is non-negotiable: chalk isn’t just sitting on the surface—it’s packed into every tiny groove, especially around the numbers. If you jump straight to wet cleaning, that chalk turns into a pasty mess, like mixing flour and water to make glue. Suddenly, you’re not cleaning—you’re creating a gritty sludge that’ll stick harder than your last bad decision.
A good dry wipe isn’t just a lazy swipe. Press firmly (but don’t go Hulk mode) and rotate the ball so you’re hitting all sides. Pay extra attention to the cue ball—that thing picks up more chalk than a middle-school whiteboard. If you’re dealing with a bar set that hasn’t been cleaned since the Reagan administration, you might need to hit it twice.
Pro Tip: If your cloth starts looking like a powdered donut, shake it out or switch to a fresh one. No sense smearing the same dirt around like bad makeup.
2. Dampen, Don’t Drown: Lightly Dampen the Cloth, Add a Dot of Soap
Alright, now that your balls aren’t shedding chalk like a husky in summer, it’s time for the lightest touch of moisture. Keyword: lightest. We’re not giving these things a bath—just a quick refresh, like splashing water on your face after a nap.
Grab a clean microfiber cloth (yes, another one—this isn’t a “one-towel-fits-all” situation) and run it under lukewarm water. Wring it out like you’re strangling a bad habit—it should feel barely damp, not dripping. Then, add a dot of mild dish soap. We’re talking pea-sized, not “free sample at Costco” sized. Too much soap leaves a film that’ll attract dirt faster than a free buffet.
Here’s where people mess up: they treat pool balls like dirty pans, scrubbing like they’re trying to erase sins. Nope. Gently wipe in one direction, lifting the cloth to check for grime. If you see streaks, you’ve either used too much soap or not wrung the cloth enough. Either way, dial it back—this isn’t a slip ‘n slide.
Pro Tip: If your balls still feel sticky after drying, you’ve over-soaped. Rinse the cloth, wring it bone-dry, and wipe again to remove residue.
3. Buff in Circles: Like Waxing a Ferrari, But Cheaper
Now for the fun part—buffing. This isn’t just wiping; it’s giving those balls the kind of shine that makes people question if you’ve been sneaking them into a jewelry polisher. Use a fresh, dry microfiber cloth (seriously, stop reusing the same one—it’s gross) and press in small, tight circles. Imagine you’re waxing a car, minus the midlife crisis.
The goal here isn’t just to dry—it’s to bring out the gloss. Cheap balls might not gleam like diamonds, but even they’ll roll smoother after a proper buff. Focus on the high-contact areas: the equator of the ball (where it hits the table most) and the numbered spots. If you’ve got a textured cloth, even better—it’ll grab microscopic dirt you didn’t know was there.
Warning: Don’t go full NASCAR pit crew on them. Over-buffing can create heat friction, which—surprise!—can warp cheaper balls. Just 10-15 seconds per ball is plenty.
Pro Move: For tournament-level slickness, some pros use a drop of car wax (the non-abrasive kind) once a year. Buff it in, let it haze, then wipe off. Congrats—your balls just outclassed the pool hall’s.
Dry Immediately**: Left wet = chalk magnet
Dry Wipe First: Knock Off Loose Chalk With a Dry Cloth
You ever notice how pool balls at your local dive bar look like they’ve been rolling through a construction zone? That’s not just bad lighting—it’s layers of chalk, dust, and probably a few questionable life choices clinging to them. Before you even think about adding moisture, grab a dry microfiber cloth (the kind that doesn’t double as your gym towel) and give those balls a good once-over.
Dry wiping isn’t just about lazily swiping at the surface. You’re on a mission to evict all the loose debris that’s been squatting rent-free in the tiny grooves. Press firmly but don’t go full Hulk—no need to sand off the numbers. A smooth, circular motion works best, like you’re polishing a trophy you definitely didn’t earn.
Chalk’s the main offender here. That powdery menace sticks to everything, and if you skip this step, you’re just pushing it deeper into the ball’s pores when you add soap later. Think of it like trying to clean a whiteboard with a wet rag before erasing it—smear city. And nobody wants their cue ball leaving skid marks like a nervous Chihuahua on a tile floor.
Pro tip: If your cloth comes away looking like a cocaine exhibit, congratulations—you’ve just upgraded your game by 20%.
Dampen, Don’t Drown: Lightly Dampen the Cloth, Add a Dot of Soap
Now that you’ve exiled the loose gunk, it’s time for the spa treatment. But hold up—this isn’t a bubble bath. Your pool balls aren’t out here trying to relax with cucumber slices. Overwatering is how you end up with warped, sad-looking spheres that roll like they’ve got a flat tire.
Run your microfiber under lukewarm water for half a second, then wring it out like you’re strangling a bad habit. It should feel like a slightly damp handshake, not a wet dog. Add a dot of mild dish soap (avoid anything labeled “industrial strength” or “citrus explosion”—this isn’t a degreasing operation).
Here’s where people mess up: They treat soap like it’s free. A pea-sized amount is plenty. You’re not scrubbing a frying pan after Taco Tuesday. Too much soap leaves a residue that’ll attract dirt faster than a free sample table at Costco.
Buff in Circles: Like Waxing a Ferrari, But Cheaper
Time to put some elbow grease into it—literally. Pretend you’re detailing a luxury car, except instead of a six-figure paint job, you’re working with a $30 set of Aramith knockoffs. Small, tight circles are the move. This isn’t a race; slow and steady keeps the finish smooth and avoids swirl marks.
Focus on one section at a time. Rotate the ball like you’re inspecting a suspect diamond, hitting every angle. The numbered grooves? That’s where grime goes to retire. Use a soft-bristle toothbrush (new, unless you enjoy the taste of chalk) to gently excavate the digits.
Pressure matters. Too light, and you’re just redistributing dirt. Too hard, and you’re sanding off the shine. Aim for the sweet spot—like massaging a sore shoulder, not CPR.
Fun fact: Pros buff their balls (heh) before big matches. It’s not just vanity; clean balls roll truer. Science or superstition? You decide.
Dry Immediately: Left Wet = Chalk Magnet
Here’s the step everyone ignores until their balls are crustier than a day-old donut. The second you’re done washing, grab a fresh, dry microfiber and wipe ’em down like you’re defusing a bomb. Water spots? Enemy number one.
Moisture left on the surface is a chalk invitation. Ever seen a cue ball that looks like it’s been dusted with powdered sugar? That’s what happens when you air-dry. And don’t even think about using paper towels—they’re basically sandpaper in disguise.
Store them in a ventilated case, not a Ziploc. Trapped humidity turns your pristine set into a science experiment.
TL;DR:– Dry wipe first or risk grinding chalk into the surface.- Damp, not drenched. Soap is a condiment, not a main course.- Buff like you care. Your balls deserve effort.- Dry fast, or prepare for a chalky reunion.
Do it right, and your balls will glide like they’re on butter. Do it wrong, and well… enjoy your gritty, inconsistent mess.