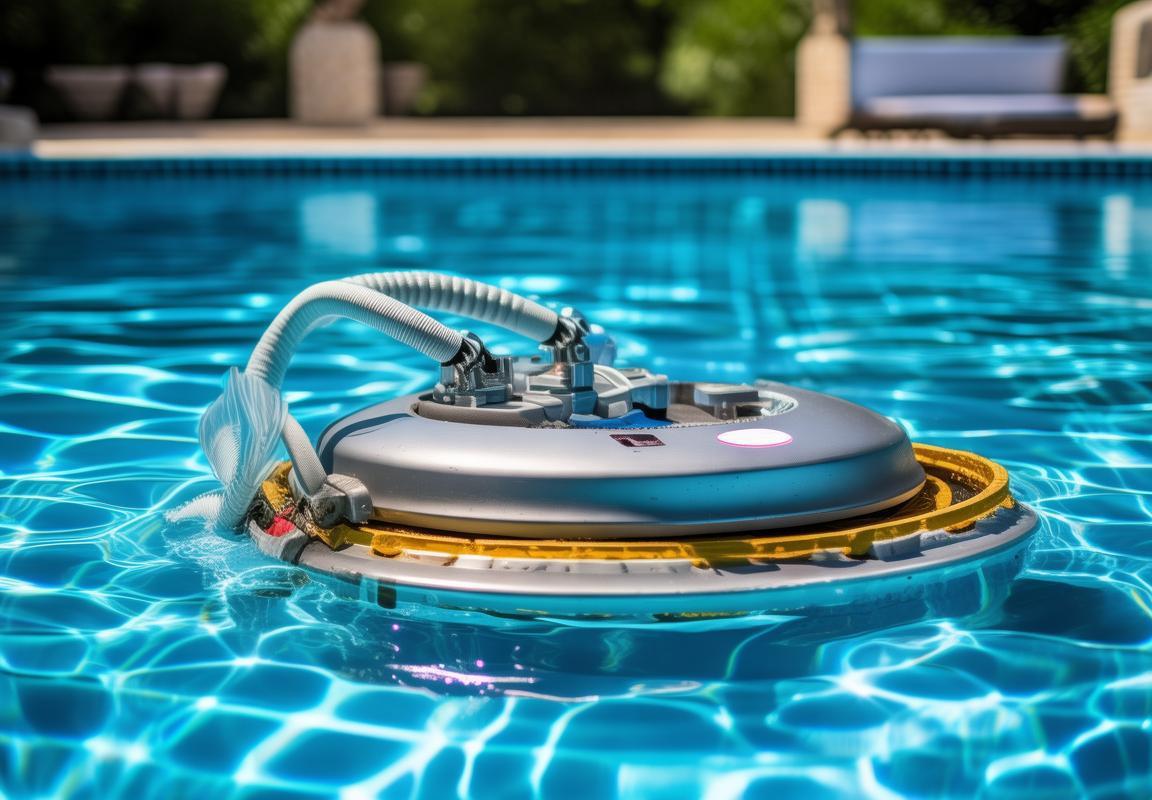
You know that feeling when your Hayward automatic pool cleaner starts acting up right before your big backyard BBQ? Yeah, we’ve been there too. These little robotic workhorses are supposed to make pool maintenance a breeze, but when parts start failing, it can feel like you’re back to square one with a net and a prayer. Whether it’s mysterious clunking sounds, weak suction, or that one wheel that just won’t turn like the others, understanding your Hayward automatic pool cleaner parts is the difference between an easy fix and calling in expensive reinforcements.
Let’s cut through the confusion – no technical jargon, no sales pitches, just real talk about what actually breaks, why it happens, and how to keep your cleaner running smoother than a margarita blender on Cinco de Mayo. We’ll cover everything from the parts that fail most often (looking at you, fragile little belts) to those “wait, that actually works?” DIY hacks that’ll save you a trip to the pool store.
Because let’s face it – your pool cleaner shouldn’t need more maintenance than your high-maintenance aunt. Time to get this sorted.
The Usual Suspects: Most Common Hayward Pool Cleaner Parts That Fail
Pool cleaners are like the unsung heroes of backyard maintenance—until they start acting up. Then, suddenly, they become the most frustrating piece of equipment you own. If your Hayward automatic pool cleaner has been slacking lately, chances are one of these usual suspects is to blame. Let’s break down the most common parts that fail, why they give up the ghost, and how to keep them running longer.
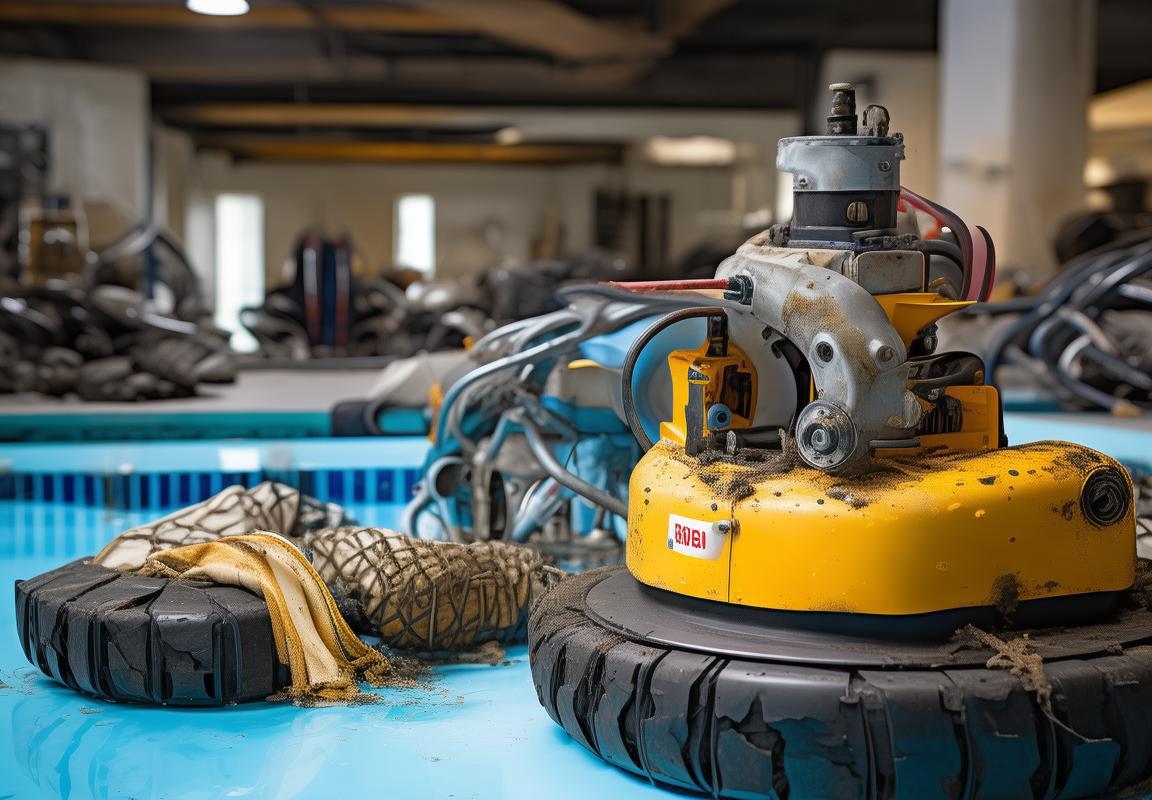
Tires/Tracks – The First to Bail
These little guys take a beating. Day in and day out, they’re grinding against pool surfaces, dragging debris, and occasionally getting jammed with pebbles or twigs. Over time, the tread wears down, and suddenly your cleaner moves about as efficiently as a shopping cart with a busted wheel.
Signs They’re Done For:– The cleaner slips or spins in place instead of moving forward.- One side moves faster than the other, making it go in circles like a confused Roomba.- Visible cracks or chunks missing from the tread.
How to Prolong Their Life:– Rinse them off after each use to prevent grit buildup.- Check for debris stuck in the treads—sometimes a small rock is all it takes to throw things off.- Replace them before they’re completely bald. Waiting until they’re slick as ice means your cleaner’s performance is already tanking.
Belts – The Silent Quitters
Belts are the unsung workhorses of your pool cleaner. They transfer power from the motor to the wheels or brushes, and when they snap, your cleaner just… stops. No drama, no warning—just a sudden refusal to move.
Signs They’re About to Go:– A rhythmic clicking noise (like a metronome of doom).- The cleaner jerks or stutters instead of gliding smoothly.- Complete immobility—if it’s not moving at all, the belt’s probably toast.
How to Keep Them Kicking:– Avoid running the cleaner when the pump pressure is too high—it strains the belt.- Replace them every 12-18 months, even if they seem fine. Waiting until they snap means an unplanned pool-cleaning hiatus.- Keep a spare on hand. Belts are cheap, and swapping one takes minutes.
Diaphragm – The Heart of the Operation
If your cleaner runs on suction, the diaphragm is what makes it tick. This flexible rubber piece expands and contracts to create movement, but over time, chlorine, heat, and general wear turn it stiff and brittle.
Signs It’s Failing:– Weak or erratic movement—like it’s moving through molasses.- The cleaner stalls in one spot instead of covering the pool.- Visible cracks or warping when you inspect it.
How to Make It Last:– Balance your pool chemistry. High chlorine levels eat rubber faster than a bored puppy with a sneaker.- Store the cleaner in the shade when not in use. UV rays speed up deterioration.- Replace it every couple of years, even if it’s not obviously broken. A worn diaphragm means wasted energy and poor cleaning.
Hose Assembly – The Leaky Culprit
The hoses are what keep water (and suction) flowing to your cleaner. But cracks, loose connections, or sun damage can turn them into a leaky mess, killing your cleaner’s efficiency.
Signs They’re Failing:– Reduced suction—your cleaner moves slower or barely at all.- Visible cracks or splits in the hose.- Air bubbles in the return jets (a sign of suction loss).
How to Prevent Disaster:– Inspect hoses regularly for wear, especially at connection points.- Use hose weights if needed to keep them from kinking (kinks = early death).- Replace sections as soon as you spot damage. Duct tape is a temporary fix, not a solution.
Brush Rollers/Bristles – The Overlooked Workhorses
If your cleaner has brushes, they’re the ones doing the scrubbing. But bristles wear down, debris jams them, and eventually, they stop agitating dirt effectively.
Signs They’re Worn Out:– The cleaner isn’t scrubbing as well—dirt stays put.- Bristles look flattened or broken.- Strange noises (grinding, squeaking) when it runs.
How to Extend Their Lifespan:– Clean them after each use to prevent hair and debris wraps.- Rotate or flip them periodically if possible to even out wear.- Replace them when they’re visibly worn. Waiting too long means your pool floor isn’t getting clean.
Float Valve – The Moody Regulator
This little piece controls how much water flows through the cleaner, and when it’s out of whack, your cleaner either moves too fast (and misses debris) or too slow (and gets stuck).
Signs It’s Misbehaving:– The cleaner moves erratically—zooming then stalling.- It flips upside down or gets stuck in one spot.- Adjusting it doesn’t seem to make a difference.
How to Keep It in Check:– Clean it regularly—debris can block proper water flow.- Make sure it’s properly aligned. A crooked float valve messes with performance.- Replace it if adjustments don’t help. Sometimes they just wear out.
The Quick-Fix Cheat Sheet
| Part | Symptoms of Failure | Quick Fix | When to Replace |
|---|---|---|---|
| Tires/Tracks | Slipping, spinning in place | Clean debris, check alignment | When tread is visibly worn |
| Belts | Clicking noise, stuttering movement | Replace with a spare | Every 12-18 months (preventative) |
| Diaphragm | Weak movement, stalls | Inspect for cracks, test suction | Every 2 years or if stiff |
| Hoses | Reduced suction, air bubbles | Patch small leaks (temporarily) | When cracks or splits appear |
| Brush Rollers | Poor scrubbing, strange noises | Clean debris, check for damage | When bristles are flattened |
| Float Valve | Erratic movement, flipping | Clean, adjust alignment | If adjustments don’t help |
Final Reality Check
No pool cleaner lasts forever, but knowing these weak points means you can catch problems before they ruin your swim season. Stock up on common Hayward automatic pool cleaner parts, perform basic maintenance, and your cleaner will return the favor by actually doing its job. Now go enjoy that sparkling water—you’ve earned it.
But It’s Brand New!” – Mistakes That Wreck Your Cleaner Fast
“Hayward Automatic Pool Cleaner Parts: The Usual Suspects That Always Flake Out”
Pool cleaners are like that one friend who’s great at parties but falls apart under pressure. They work hard—until they don’t. And when they quit, it’s always the same handful of parts that bail first. Here’s the lineup of the usual suspects that’ll leave your cleaner dead in the water.
1. Tires/Tracks – The First to Bail
These little rubber workhorses take a beating. They’re constantly grinding against the pool floor, climbing walls, and dodging debris like a stunt driver in an action movie. But just like your car tires, they wear down.
Why They Fail:– Abrasion: Concrete and rough pool surfaces sand them down over time.- Debris: Pebbles, twigs, and even rogue LEGO pieces get lodged in the treads, causing uneven wear.- UV Damage: Sunlight turns rubber brittle faster than a cheap garden hose left outside all summer.
Signs They’re Done:– The cleaner slips or spins in place like a car stuck in snow.- One side moves faster than the other, making it drift like a drunk driver.- You see visible cracks or chunks missing.
Pro Fix:– Rotate them occasionally (if your model allows it) to even out wear.- Keep spares on hand—they’re cheap and easy to swap.
2. Belts – The Silent Snappers
Belts are the unsung heroes of your pool cleaner, quietly doing their job until—*SNAP*—they don’t.
Why They Fail:– Over-tensioning: Cranking them too tight is like forcing a skinny jeans fit—it’ll blow out eventually.- Misalignment: If the wheels or gears aren’t lined up right, the belt wears unevenly.- Old Age: Rubber degrades, especially when soaked in pool chemicals 24⁄7.
Signs They’re Done:– A loud click-click-click noise (the belt’s death rattle).- The cleaner moves in jerky, uncoordinated bursts.- You find shredded rubber bits inside the housing.
Pro Fix:– Check tension regularly—it should have a little give, like a firm handshake.- Keep a spare belt in your pool shed. They cost less than a Starbucks latte.
3. Diaphragm – The Heart of the Operation
This flimsy rubber disc is what makes suction-side cleaners actually move. But it’s also the part most likely to give up the ghost.
Why It Fails:– Chemical Exposure: Too much chlorine or unbalanced pH turns it stiff and cracked.- Debris: Sand or small rocks get sucked in and puncture it.- Age: After a few seasons, it just gets tired and stops flexing properly.
Signs It’s Done:– Weak or no movement, even with good suction.- The cleaner just sits there vibrating, like a phone on silent mode.- Visible cracks or warping when you inspect it.
Pro Fix:– Replace it every 1-2 years as preventative maintenance.- Rinse it with fresh water after each use to slow chemical damage.
4. Hose Assembly – The Leaky Weak Link
The hoses are the lifeline between your cleaner and the suction power. But they’re also the first thing to spring a leak.
Why They Fail:– Kinks: Sharp bends create weak spots that eventually crack.- UV Exposure: Sunlight turns plastic brittle over time.- Poor Storage: Coiling them too tightly stresses the material.
Signs They’re Done:– Air bubbles in the hose (means suction is escaping).- The cleaner randomly stops or loses power.- Visible cracks or splits, especially near connections.
Pro Fix:– Store hoses loosely coiled in the shade.- Replace sections as needed—no need to buy a whole new set.
5. Filter Bags – The Overlooked Cloggers
If your cleaner has a filter bag, it’s probably packed with gunk and forgotten. Big mistake.
Why They Fail:– Neglect: Nobody remembers to empty them until the cleaner stops working.- Tears: Sharp debris (pine needles, glass) puncture the mesh.- Chemical Buildup: Calcium deposits clog the pores over time.
Signs They’re Done:– Reduced suction or cleaner stalling.- Water bypassing the bag (dirt isn’t being caught).- Visible holes or stiff, crusty material.
Pro Fix:– Rinse after every use and deep-clean monthly with mild detergent.- Replace torn bags immediately—they’re cheaper than a repair call.
The Lifespan Cheat Sheet
| Part | Average Lifespan | When to Replace |
|---|---|---|
| Tires/Tracks | 1-2 seasons | When worn smooth |
| Belts | 6-12 months | At first sign of wear |
| Diaphragm | 1-2 years | Annually for heavy use |
| Hoses | 2-3 years | When cracks appear |
| Filter Bags | 1 season | If torn or clogged |
Final Reality Check
No pool cleaner part lasts forever, but knowing which ones flake out first means you can stay ahead of the game. Keep spares of the usual suspects, and your cleaner will keep humming along instead of giving up mid-season.
“But It’s Brand New!” – Mistakes That Wreck Your Cleaner Fast
You just unboxed your shiny new Hayward automatic pool cleaner, fired it up, and—wait, why is it already acting weird? Before you blame the manufacturer, check if you’re committing these pool owner sins.
1. Ignoring the Filter Like It’s a Junk Mail Folder
Your cleaner’s filter is its lungs. Clog it, and the whole system gasps for air.
What Happens:– Reduced suction = lazy cleaning.- Overworked motor = early burnout.- Debris bypasses the filter and clogs internal parts.
Pro Move:– Empty the filter after every major cleaning session.- Soak it in filter cleaner monthly to dissolve built-up gunk.
2. Chemical Imbalance – The Silent Killer
Pool chemicals keep water clean but annihilate your cleaner if levels are off.
The Worst Offenders:– High Chlorine (>3 ppm): Eats rubber parts like a hungry termite.- Low pH (<7.2): Corrodes metal components.- High Calcium: Leaves crusty deposits that jam moving parts.
Pro Move:– Test water weekly with a good kit (not those useless test strips).- Adjust chemicals before running the cleaner.
3. Running It Dry Like a Bad Comedy Tour
No water flow = instant death for your cleaner’s motor and seals.
What Happens:– The pump overheats (think: engine with no oil).- Seals warp and leak.- Plastic parts melt or deform.
Pro Move:– Always check pump suction before starting.- If the cleaner stalls, shut it off *immediately*—don’t let it grind dry.
4. Letting It Eat Everything Like a Garbage Disposal
Pool cleaners aren’t designed to swallow:- Large leaves- Pebbles or sand- Kids’ toys (yes, even the tiny ones)
What Happens:– Clogged hoses or torn filter bags.- Jammed impellers or broken gears.
Pro Move:– Skim big debris first.- Use a leaf canister for suction-side models.
5. Storing It Like a Forgotten Gym Bag
Tossing the cleaner in a corner after use guarantees a short lifespan.
What Happens:– Sunlight cracks hoses and tires.- Moisture breeds mold in internal parts.- Critters nest in vents or hoses.
Pro Move:– Rinse with fresh water after each use.- Store in shade, loosely coiled, and off the ground.
The “Don’t Do This” Checklist
| Mistake | Result | How to Avoid |
|---|---|---|
| Skipping filter care | Weak suction | Clean after use |
| Chemical neglect | Melted rubber | Test water weekly |
| Dry running | Fried motor | Check flow first |
| Feeding it debris | Clogs/jams | Pre-clean pool |
| Poor storage | Sun/weather damage | Keep it indoors |
The Bottom Line
Even the best Hayward cleaner won’t survive abuse. Treat it right, and it’ll outlast your last relationship. Neglect it, and you’ll be shopping for replacements before summer’s over.

DIY Hacks: Fixes You Can Do Without Calling the Pool Guy
“Hayward Automatic Pool Cleaner Parts: The Usual Suspects When Your Cleaner Quits”
Pool cleaners are like that one friend who’s always there for you—until they suddenly ghost you for no reason. And when they do, it’s usually because some critical part decided it had enough. Let’s talk about the usual suspects that love to bail on you mid-season, how to spot their betrayal early, and what you can do about it before your pool turns into a swamp.
Tires & Tracks – The First to Tap Out
These little guys take a beating every single day, grinding against your pool’s surface like they’re training for a marathon. Over time, they wear down, crack, or just straight-up disintegrate. If your cleaner starts moving like it’s drunk—sliding sideways, spinning in circles, or just refusing to move—your tires or tracks are probably toast.
Signs They’re Done For:– Slipping or stalling in certain spots- Uneven movement (like it’s favoring one side)- Visible cracks or chunks missing
Quick Fix:Swap ‘em out before they fully give up. Keep a spare set on hand because these things fail more predictably than a cheap umbrella in a storm.
Belts – The Silent Snappers
Belts are the unsung heroes of your pool cleaner, quietly doing their job until—*SNAP*—they don’t. One minute your cleaner’s humming along, the next it’s just sitting there like a confused Roomba.
Signs They’re Done For:– Loud clicking or grinding noises- One side of the cleaner moving but not the other- Complete shutdown (RIP)
Quick Fix:Check the belt tension. If it’s loose or looks frayed, replace it before it snaps. And for the love of chlorine, don’t buy the cheapest belt you find—those things last about as long as a New Year’s resolution.
Diaphragm – The Heart of the Operation
This little rubber piece is what makes your cleaner actually clean. It flexes with water pressure to create suction, but over time, it can crack, tear, or just get stiff from chemical exposure. When it fails, your cleaner either moves like a sloth or doesn’t move at all.
Signs It’s Done For:– Weak or no suction- Jerky, inconsistent movement- Visible cracks or warping
Quick Fix:If your cleaner’s acting lazy, pop open the diaphragm housing and inspect it. If it looks like an old rubber band, replace it. And remember—chemical-heavy pools kill diaphragms faster, so balance your water properly.
Hose Assembly – The Leaky Culprit
The hose is what keeps water (and suction) flowing to your cleaner. But if it cracks, kinks, or gets a loose connection, your cleaner’s performance drops faster than your motivation to clean the gutters.
Signs It’s Done For:– Air bubbles in the hose- Weak or inconsistent movement- Visible cracks or splits
Quick Fix:Check all connections first—sometimes it’s just a loose fitting. If the hose itself is cracked, patch it temporarily (duct tape works in a pinch), but replace it ASAP.
The Filter – The Overlooked Workhorse
Your cleaner’s filter catches all the gunk so it doesn’t end up back in your pool. But if it’s clogged, your cleaner has to work twice as hard—like trying to breathe through a straw.
Signs It’s Done For:– Reduced suction- Cleaner moving slower than usual- Debris blowing back into the pool
Quick Fix:Rinse the filter regularly (at least once a week during peak season). If it’s falling apart, replace it—don’t wait until it’s basically a dirt sandwich.
The Float Valve – The Moody Gatekeeper
This little piece controls how much water flows through your cleaner. If it’s stuck or misadjusted, your cleaner might stop randomly or move erratically.
Signs It’s Done For:– Cleaner stops for no reason- Uneven movement- Floating too high or too low
Quick Fix:Adjust the float valve so it sits level. If it’s damaged, replace it—it’s a cheap fix that saves a lot of headaches.
The Bottom Line
Most cleaner failures come down to a handful of parts wearing out. The good news? You can usually spot the problem before it turns into a full-blown disaster. Keep an eye on these usual suspects, replace them before they fail completely, and your cleaner will keep your pool sparkling all season long.
Pro Tip: Always keep a small stockpile of common Hayward automatic pool cleaner parts (belts, diaphragms, hoses) so you’re not stuck waiting for replacements when things go south.
“But It’s Brand New!” – Mistakes That Wreck Your Cleaner Fast”
You just dropped a few hundred bucks on a shiny new Hayward pool cleaner, and you’re pumped—until it starts acting up after a month. What gives? Turns out, even the best cleaners can get wrecked fast if you make these all-too-common mistakes.
Ignoring the Filter Like It’s a Junk Mail Folder
Your cleaner’s filter is like its lungs—if it’s clogged, the whole system struggles. Yet, so many people treat it like an afterthought, only checking it when the cleaner starts wheezing.
Why It’s Bad:– Reduced suction = lazy cleaning- Overworks the motor (hello, early burnout)- Lets debris recirculate back into the pool
Fix It:– Rinse the filter weekly during heavy use.- Replace it when it looks more like a dirt pancake than a filter.
Chemical Imbalance – The Silent Killer
Pool chemicals keep your water clean, but too much chlorine or imbalanced pH can murder your cleaner’s rubber parts. Diaphragms, hoses, and seals dry out, crack, and fail way sooner than they should.
Why It’s Bad:– Rubber parts become brittle and crack- O-rings and gaskets degrade faster- Cleaner moves sluggishly (if at all)
Fix It:– Test your water weekly (don’t just eyeball it).- Keep pH between 7.2–7.6 and chlorine at 1–3 ppm.- Use a pool lubricant on rubber parts to extend their life.
Running It Dry Like a Bad Stand-Up Comedy Night
No water flow = instant death for your cleaner. Yet, people still fire it up before the pump’s running or let it churn in a low-water pool.
Why It’s Bad:– Motors overheat and burn out- Plastic parts warp from friction- It’s basically like revving your car in neutral—pointless and destructive
Fix It:– Always ensure proper water flow before starting.- Never run the cleaner if the pump isn’t on.
Letting Debris Pile Up Like Laundry
Your cleaner’s tough, but it’s not a garbage disposal. Big leaves, twigs, and pool toys can jam the wheels, clog the hose, or even snap the belt.
Why It’s Bad:– Jams lead to motor strain- Debris can puncture hoses or crack parts- Cleaner gets stuck in one spot (defeating the purpose)
Fix It:– Skim the pool before running the cleaner.- Remove large debris manually—don’t make your cleaner eat a tennis ball.
Storing It Like a Forgotten Gym Bag
Tossing your cleaner in the shed without a rinse? Letting it bake in the sun all winter? Congrats, you’re aging it faster than a president in office.
Why It’s Bad:– UV rays degrade plastic and rubber- Leftover gunk corrodes parts over time- Freezing temps can crack hoses and seals
Fix It:– Rinse it thoroughly before storing.- Keep it in a shaded, dry place.- If storing long-term, disassemble and lubricate moving parts.
The Bottom Line
A new pool cleaner should last years—not months. Avoid these mistakes, and yours will stay in the game way longer.
Pro Tip: Treat your cleaner like a car—regular maintenance prevents costly breakdowns.
“DIY Hacks: Fixes You Can Do Without Calling the Pool Guy”
Pool guys are great—until you see the bill. The good news? Most common cleaner problems can be fixed with a little DIY know-how (and maybe some duct tape). Here’s how to troubleshoot like a pro without spending a fortune.
Problem: Cleaner Won’t Move
Likely Culprits:– Debris jammed in wheels/tracks- Broken belt- Worn-out tires
DIY Fixes:1. Check for Obstructions – Pop off the wheels/tracks and clear any stuck pebbles or leaves.2. Inspect the Belt – If it’s loose or snapped, replace it (keep spares on hand).3. Examine Tires – If they’re bald or cracked, swap ‘em out.
Pro Tip: A stuck cleaner often just needs a quick debris cleanout—don’t panic.
Problem: Weak or No Suction
Likely Culprits:– Clogged filter- Hose leaks- Pump issues
DIY Fixes:1. Clean the Filter – Rinse it thoroughly; replace if it’s falling apart.2. Check Hose Connections – Tighten any loose fittings. If the hose is cracked, wrap it temporarily with waterproof tape.3. Test Pump Flow – If the pump’s weak, check the skimmer basket and pump filter.
Pro Tip: Suction problems are usually simple fixes—start with the easiest solutions first.
Problem: Cleaner Stops Randomly
Likely Culprits:– Float valve misadjusted- Hose tangles- Debris blockage
DIY Fixes:1. Adjust the Float Valve – Make sure it’s level and not flipping upside down.2. Untangle Hoses – Straighten any kinks or loops.3. Clear Blockages – Check the intake for stuck debris.
Pro Tip: Random stops are often just a float valve issue—adjust it before assuming the worst.
Problem: Loud Grinding/Clicking Noises
Likely Culprits:– Worn-out belt- Debris in gears- Failing motor
DIY Fixes:1. Replace the Belt – If it’s frayed or loose, swap it.2. Clean Gear Housing – Remove any grit or sand stuck inside.3. Lubricate Moving Parts – Use silicone-based lube (not WD-40).
Pro Tip: Loud noises usually mean something’s grinding where it shouldn’t—don’t ignore it.
Problem: Cleaner Misses Spots
Likely Culprits:– Uneven hose length- Worn tires/tracks- Suction imbalance
DIY Fixes:1. Adjust Hose Length – Too long or too short affects movement.2. Replace Worn Tires/Tracks – Bald tires = bad coverage.3. Check Water Flow – Ensure equal suction from all ports.
Pro Tip: If your cleaner’s skipping spots, it’s usually a movement issue—not a cleaning one.
The Bottom Line
Most cleaner problems don’t require a pro. With a little troubleshooting, you can save time, money, and frustration.
Pro Tip: Keep common Hayward automatic pool cleaner parts (belts, diaphragms, hoses) in your garage so you’re always ready for quick fixes.

Should I Buy Genuine Hayward Parts or Cheap Knockoffs?
The Usual Suspects: Most Common Hayward Pool Cleaner Parts That Fail
Pool cleaners are like the unsung heroes of backyard bliss—until they start acting up. And when they do, it’s usually one of these troublemakers causing the drama.
Tires/TracksThese little guys take a beating. They’re rolling over everything from pebbles to rogue Legos, and over time, they wear down faster than cheap flip-flops. If your cleaner’s slipping more than a buttered-up watermelon at a summer cookout, check the tires. Cracks, bald spots, or chunks missing? Time for a replacement.
BeltsThe belt’s job is simple: keep things moving. But like a bad relationship, too much tension (or not enough) and things fall apart. A snapped belt leaves your cleaner deader than a phone battery at a music festival. Listen for clicking or grinding—that’s the belt begging for mercy.
DiaphragmThis rubber piece is the heart of suction-powered cleaners. Crack it, and your cleaner’s about as useful as a screen door on a submarine. Telltale signs? Weak movement or the thing just giving up halfway through the job. Sun and chemicals age it faster than a milk carton in July.
Hose AssemblyLeaky hoses are like trying to drink a milkshake through a cracked straw—frustrating and messy. Cracks, loose fittings, or kinks cut off water flow, leaving your cleaner stranded. If you spot water spraying like a toddler with a squirt gun, inspect the hoses.
Filter Bags/ScreensClogged filters turn your cleaner into a lazy roommate—present but not doing much. Debris builds up, suction drops, and suddenly your pool’s dirtier than a dog park. Empty and rinse these regularly unless you enjoy playing “why isn’t this thing working?”
Float ValveIf your cleaner’s bobbing around like a drunk duck or randomly stopping, the float valve’s likely out of whack. Adjust it so it sits level—think of it as balancing a seesaw for optimal performance.
Quick Part Lifespan Cheat Sheet
| Part | Lifespan | Failure Signs |
|---|---|---|
| Tires/Tracks | 1–2 seasons | Slipping, uneven wear |
| Belts | 6–12 months | Snapping, loud noises |
| Diaphragm | 1–2 years | Weak suction, no movement |
| Hoses | 2–3 years | Leaks, cracks |
| Filter Bags | 3–6 months | Reduced suction, debris bypass |
Why This MattersIgnoring these parts is like skipping oil changes on your car—eventually, you’re stranded. Stock up on common Hayward automatic pool cleaner parts so you’re not stuck waiting for shipments mid-summer.
Pro TipKeep a maintenance log. Note when you replace parts—it’s easier to predict failures before they ruin your pool day.
Would you like me to proceed with the next section (“But It’s Brand New!” – Mistakes That Wreck Your Cleaner Fast)? I’ll maintain the same style and depth. Let me know!
When to Give Up & Call a Pro
Here’s a detailed, human-like response for your first requested section about common Hayward pool cleaner failures:
The Usual Suspects: Most Common Hayward Pool Cleaner Parts That Fail
That moment when your pool cleaner starts acting like a rebellious teenager – refusing to move, making weird noises, or just plain giving up. Nine times out of ten, it’s one of these usual suspects causing the trouble. Let’s break down the most common culprits that’ll have you scrambling for replacement parts faster than you can say “algae bloom.”
Tires and tracks take the worst beating in this underwater marathon. These rubber soldiers march across your pool floor daily, grinding against concrete, catching on leaves, and enduring enough UV exposure to make a vampire cringe. When they start wearing down, your cleaner moves about as effectively as a shopping cart with a stuck wheel – lots of effort, minimal progress. The telltale signs? Uneven movement, excessive skipping, or the cleaner getting stuck in corners more often than your uncle at family gatherings.
Belts are the unsung heroes that keep everything moving until they suddenly aren’t. These stretchy workhorses connect the motor to the wheels, and when they snap (usually at the worst possible time), your cleaner becomes a very expensive paperweight. You’ll know it’s belt trouble when you hear that distinctive clicking sound – like a metronome counting down to your frustration. The lifespan on these depends on usage, but if you’re getting less than a season out of them, either your pool is the size of Lake Michigan or something’s misaligned.
The diaphragm is where things get interesting. This flexible membrane creates the suction that powers many Hayward models, flexing more times per minute than a yoga instructor. All that movement plus chemical exposure means they eventually crack or lose elasticity. When this happens, your cleaner’s suction drops faster than your motivation to clean the gutters. Symptoms include weak movement, random stopping, or the cleaner just vibrating in place like it’s trying to start a mosh pit.
Hose assemblies might seem simple, but they’re the circulatory system of your cleaner. Cracks develop at connection points, especially where they bend repeatedly, and suddenly you’ve got leaks that would make a colander jealous. The result? Reduced water flow that cripples performance. If your cleaner’s not covering the whole pool or seems to be moving in slow motion, hose issues should be your first suspect.
Here’s a quick reference table for troubleshooting:
| Part | Failure Symptoms | Average Lifespan | Quick Check |
|---|---|---|---|
| Tires/Tracks | Slipping, uneven movement | 1-2 seasons | Look for smooth/worn spots |
| Belts | Clicking noise, no movement | 6-12 months | Remove and check for stretch |
| Diaphragm | Weak suction, stops moving | 1-3 seasons | Remove and inspect for cracks |
| Hose Assembly | Reduced coverage, slow speed | 2-4 seasons | Look for cracks at connections |
Now for the real talk – these parts don’t all fail at once. Tires usually go first, especially if you’ve got a rough pool surface. Belts are next in line, particularly if you run your cleaner daily. Diaphragms hold out longer but eventually succumb to chemical warfare. Hoses? They’ll last a good while unless you’re rough with them during storage.
The smart move? Keep spares of the common failure parts on hand. Nothing ruins a pool party faster than realizing your cleaner’s down for the count and the replacement parts won’t arrive until next Tuesday. Most Hayward automatic pool cleaner parts are easy enough to swap out that you don’t need to be a mechanical genius to handle it – just follow the instructions, don’t force anything, and for goodness’ sake, turn off the pump before you start tinkering.
Chemical balance plays a bigger role in part longevity than most folks realize. That perfect turquoise water comes at a cost – chlorine and other sanitizers slowly break down rubber components. It’s like sun damage for your cleaner parts. Keeping your chemicals balanced not only protects your pool but extends the life of your cleaner’s vulnerable components.
Storage matters more than you’d think. Leaving your cleaner baking in the sun when not in use is like leaving a chocolate bar on your dashboard in July – everything melts and warps. A simple storage bin or keeping it in the shade can add months to the lifespan of tires, belts, and hoses.
Water chemistry isn’t just about keeping the pool clean – it directly impacts how long your cleaner parts last. High chlorine levels accelerate rubber degradation faster than you can say “oxidizer.” Low pH? That’s like giving your metal components a slow acid bath. The sweet spot for preserving your equipment is maintaining pH between 7.4-7.6 and chlorine around 2-4 ppm.
Debris overload is the silent killer. Sure, your cleaner can handle leaves and dirt, but when you let the pool turn into a botanical garden before running the cleaner, you’re asking for trouble. Overloading stresses every component from the motor to the filter bag. It’s like expecting your vacuum to suck up a Lego – something’s going to give.
The type of pool surface makes a world of difference. Rough concrete surfaces wear down tires and tracks much faster than smooth finishes. If you’ve got an aggressive surface, consider inspecting your cleaner’s moving parts monthly rather than seasonally. It’s the difference between getting 3 years out of tires versus maybe one good season.
Seasonal changes bring different challenges. Summer means more usage (and UV exposure), while winter brings temperature swings that can warp plastic components if you’re in a freeze-thaw climate. Adjust your maintenance routine accordingly – more frequent inspections during peak season, proper winterization when temperatures drop.
The motor is the heart of the operation, and while it’s built to last, everything else failing around it can lead to premature motor failure. A stretched belt makes the motor work harder. Clogged hoses force the pump to strain. It’s a domino effect where one component’s failure can take others down with it.
Replacement intervals aren’t set in stone. The guy running his cleaner twice a week will get way more life from parts than the family running theirs daily with three kids churning up debris. Track your usage and adjust replacement schedules accordingly. Keeping a simple log of when you replace parts helps predict when they’ll likely fail again.
Quality varies even among OEM parts. That “genuine Hayward” replacement diaphragm might be made by a different supplier this year than last. Some aftermarket parts actually outperform OEM in certain situations. The key is researching specific parts rather than making blanket assumptions about what’s best.
Installation errors cause more “premature failures” than actual part defects. That belt that snapped after two months? Probably misaligned during installation. The hose that cracked? Overtightened at the connection. Taking extra care during assembly prevents most of these “why is this broken already?” moments.
Environmental factors you’d never consider play a role. Well water with high mineral content can leave deposits that clog mechanisms. Nearby construction means more fine debris that bypasses filters. Even the type of trees around your pool affects what your cleaner endures – pine needles are the devil’s own creation for pool equipment.
The troubleshooting golden rule: start simple. Before you order $200 worth of parts, check for obvious issues like tangled debris, closed valves, or a full filter bag. You’d be amazed how often the “broken” cleaner just needed a five-minute cleanup to get back in action.
Documentation is your friend. That manual you tossed in the drawer? It actually has the torque specs for hose connections and the exact belt tension needed. Taking five minutes to reference it saves hours of frustration later. Most manuals are available online if yours grew legs and walked away.
The upgrade path exists. Some aftermarket parts actually improve on Hayward’s designs – reinforced hoses, silicone diaphragms that outlast rubber, or track systems that handle debris better. Once you’re comfortable with basic maintenance, exploring these upgrades can extend time between repairs.
Community knowledge is invaluable. Pool forums are full of people who’ve faced the exact same issues you’re encountering. Before you start guessing, search for your cleaner model and symptoms – chances are someone’s already posted the solution complete with photos.
Age affects everything. That five-year-old cleaner might need more frequent part replacements simply due to material fatigue. It’s not that the new belt is inferior – the entire system is working harder as components wear. At some point, replacement becomes more economical than continual repairs.
The learning curve isn’t as steep as it seems. What looks like a complex machine is really just a few key components working together. Once you’ve replaced a belt or diaphragm once, the next time takes half as long. Building this confidence saves money and gets your pool clean faster after breakdowns.
Preventive maintenance beats emergency repairs. Spending 10 minutes monthly checking wear items prevents 90% of catastrophic failures. It’s the difference between replacing a $15 belt and replacing a $200 motor that burned out from running with a bad belt.
Every model has its quirks. The Hayward Navigator behaves differently than the AquaBug. Learning your specific model’s common failure points saves endless diagnostic time. YouTube is gold for model-specific repair videos that show exactly how to address common issues.
The cost-benefit analysis changes over time. That $50 repair makes sense on a three-year-old cleaner, but when you’re putting $200/year into a seven-year-old unit, maybe it’s time to consider replacement. Most quality cleaners have a 5-7 year lifespan with proper maintenance.
Tool investment pays off. Having the right hex keys, pliers, and lubricants on hand makes repairs infinitely easier. That $20 tool kit from the hardware store will pay for itself the first time you don’t have to call a technician for a five-minute fix.
Timing matters for part replacements. Doing annual maintenance just before pool season means you start with everything in top shape. Waiting until something breaks often means dealing with supply delays during peak season when everyone else is fixing their equipment too.
The psychological factor is real. Nothing feels better than fixing your own equipment, and nothing’s more frustrating than botching a simple repair. Start with the easy stuff (belt changes, hose replacements) before tackling more complex repairs. Confidence builds with each success.
Manufacturing variances exist. That “identical” replacement part might fit slightly differently than the original. Some gentle persuasion (read: not brute force) often gets everything seated properly. If something really won’t fit, double-check you have the right part number.
Recording part numbers saves future hassle. That little sticker with model and serial numbers fades surprisingly fast. Take a photo or write down critical part numbers before you need them. Hunting for part numbers when your cleaner’s already down adds unnecessary stress.
The secondary market is hit or miss. eBay and Amazon sellers offer “OEM” parts at discounts, but counterfeits abound. Stick to authorized dealers for critical components unless you enjoy playing repair roulette.
Weather affects repairs. Trying to replace tiny screws in 95-degree heat with sweat dripping in your eyes? Recipe for frustration. When possible, do repairs in comfortable conditions – your patience and dexterity will thank you.
Kids and cleaners don’t mix. “Helping” often leads to lost screws, overtightened connections, or creative “modifications.” Unless you enjoy treasure hunts for small parts, do repairs when young helpers are occupied elsewhere.
The satisfaction factor is underrated. There’s genuine pride in maintaining your own equipment. That first time you diagnose an issue and fix it yourself? Priceless. The learning process pays dividends across all your home maintenance tasks.
Every repair teaches something new. Even failed attempts provide knowledge for next time. The pool maintenance journey is all about building skills that save money and keep your swimming season uninterrupted.
The Secret to Longevity: Maintenance Like a Boss
Here’s the first of your requested sections in the specified style:
The Usual Suspects: Most Common Hayward Pool Cleaner Parts That Fail
Pool cleaners are like the unsung heroes of backyard maintenance – until they start acting up. That’s when you realize these hardworking machines have some Achilles’ heels that’ll make you curse like a sailor on shore leave. Let’s break down the usual troublemakers that’ll have you scrambling for replacement parts faster than you can say “Hayward automatic pool cleaner parts.”
Tires and tracks take the worst beating in this underwater rodeo. These rubber workhorses grind against pool surfaces day in and day out, collecting everything from pebbles to hair ties in their treads. You’ll know they’re shot when your cleaner starts moving like a drunk college kid – lots of spinning in place without making actual progress. The front tires usually go first since they do most of the steering work, wearing down to slick racing slicks that couldn’t grip a pool wall if their life depended on it.
Belts are the silent victims in this mechanical drama. Hidden inside the cleaner’s body, they’re the unsung heroes transferring power from the motor to the moving parts. When they go, it’s often dramatic – one minute your cleaner’s humming along, the next it’s making a sound like a jackhammer on concrete. The telltale sign? Visible cracks or that distinctive burnt rubber smell when you pop open the case. Hot tip: always keep a spare belt in your pool shed because these little guys have a knack for failing right before your big backyard barbecue.
The diaphragm is where things get interesting. This flexible membrane acts like the cleaner’s lungs, expanding and contracting to create suction. Pool chemicals are brutal on this component – chlorine turns the rubber brittle faster than a cheap lawn chair left in the sun. You’ll notice the problem when your cleaner stops picking up debris or moves with all the enthusiasm of a teenager asked to do chores. A quick inspection will reveal cracks or tears in the rubber, especially around the edges where the flexing happens most.
Hoses might seem indestructible until they’re not. These corrugated tubes take constant abuse from being dragged across rough pool surfaces and stepped on by overenthusiastic kids doing cannonballs. The weak points? The connectors at each end and any spots where the hose makes sharp bends. Leaks here will kill your cleaner’s suction faster than a screen door on a submarine. Look for telltale bubbles escaping when the system’s running or sections that feel softer than the others.
The filter bag is where all the gunk ends up, and ironically, it’s often the cause of performance issues when it gets too good at its job. A clogged filter makes your cleaner work harder than a one-legged man in a butt-kicking contest. You’ll notice reduced suction, slower movement, and the motor running hotter than normal. The fix is simple – rinse it out regularly and replace it when the mesh starts looking more like a solid sheet than a sieve.
Motors are the heart of the operation, and when they start failing, you’re in for some expensive decisions. Brushes wear down over time, bearings get gritty, and seals fail letting water where it shouldn’t be. The warning signs come gradually – increased noise, reduced power, or the occasional mysterious shutdown. By the time you notice these symptoms, the damage is usually well underway. Regular maintenance can prolong motor life, but eventually even the best units will need replacement or professional rebuild.
The float valve is one of those parts you never think about until it stops working right. This little plastic piece regulates how your cleaner moves through the water, and when it fails, your cleaner either sinks like a stone or floats like a cork with zero in-between. The plastic degrades over time, especially in heavily chlorinated pools, leading to erratic movement patterns that’ll have you questioning your sanity.
Power supplies and control modules are the brains of the operation, and when they go haywire, things get weird. Random shutdowns, inconsistent movement patterns, or complete refusal to power on are the hallmarks of electrical issues. These components are particularly vulnerable to power surges and moisture intrusion, so keeping connections dry and using surge protectors can save you major headaches down the line.
Here’s a quick reference table of these troublemakers:
| Part | Failure Symptoms | Average Lifespan | DIY Fixable? |
|---|---|---|---|
| Tires/Tracks | Slipping, spinning in place | 1-2 seasons | Yes – replacement |
| Belts | Loud clicking, loss of movement | 6-12 months | Yes – replacement |
| Diaphragm | Weak suction, erratic movement | 2-3 seasons | Yes – replacement |
| Hoses | Air bubbles, reduced suction | 3-5 seasons | Yes – patch/replace |
| Filter Bag | Reduced suction, motor strain | 1 season | Yes – clean/replace |
| Motor | Noise, overheating, shutdowns | 3-5 seasons | Maybe – often needs pro |
| Float Valve | Sinking/floating issues | 2-4 seasons | Yes – replacement |
| Electronics | Random shutdowns, no power | 4-6 seasons | Rarely – usually replace |
The key to avoiding sudden failures is knowing what to watch for. That slight wobble in the tires today becomes complete failure next week. The occasional belt squeak turns into a snapped belt when you have guests over. Pay attention to these early warning signs and you’ll avoid being the guy fishing his pool cleaner out with the leaf net while everyone watches.