DIY It: If You Can Handle a Wrench and Follow YouTube Tutorials Without Crying, Go For It
Let’s be real—some of us were born with a tool belt strapped on, while others think a Phillips head is a fancy cocktail. If you fall somewhere in the middle—maybe you’ve successfully assembled IKEA furniture without leftover screws or jury-rigged a leaky faucet with more optimism than skill—then installing a booster pump for your pool cleaner might just be in your wheelhouse.
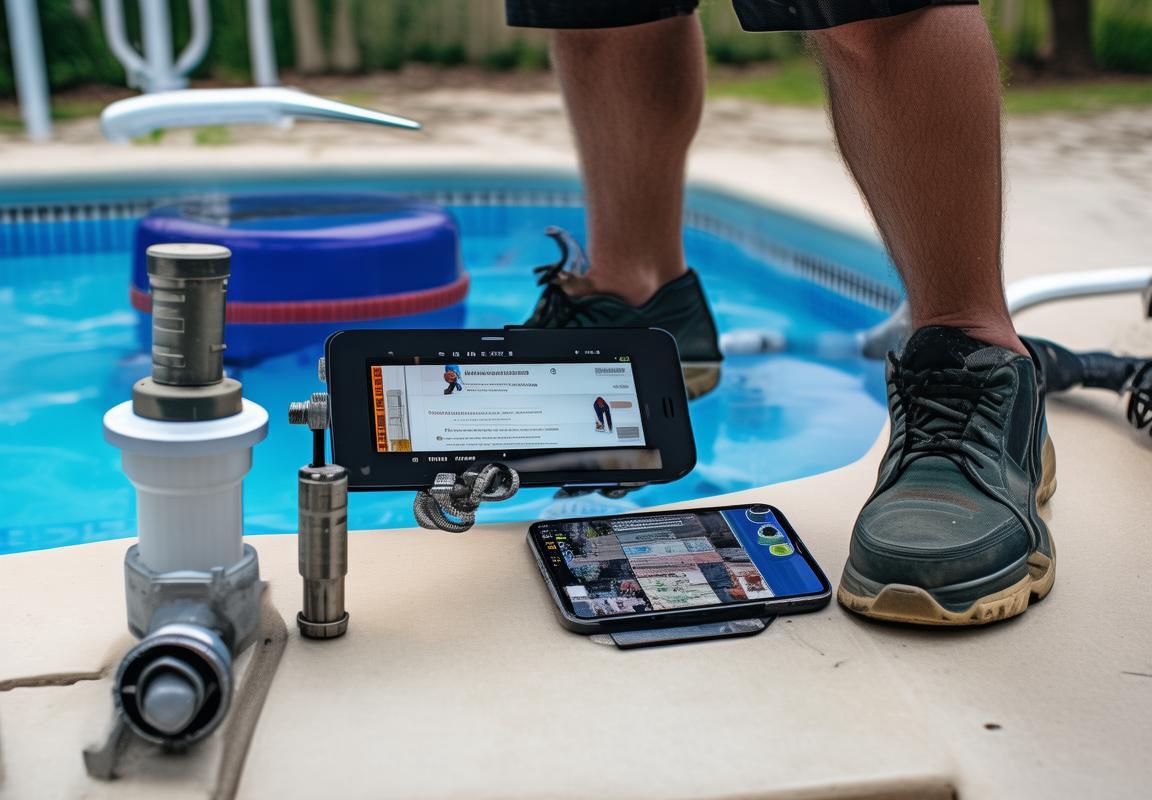
First things first: tools. You’ll need more than just a rusty wrench from the back of your garage. A decent adjustable wrench, some Teflon tape (the unsung hero of plumbing), PVC primer and cement (if you’re cutting pipes), and maybe a screwdriver that hasn’t been used as a paint can opener. Oh, and a YouTube tutorial pulled up on your phone—preferably one where the guy doesn’t mumble like he’s narrating a nature documentary.
Now, the actual process. Shut off the power to your pool equipment unless you’re aiming for a Darwin Award. Locate where your booster pump is going—usually near your existing filtration system. If your plumbing looks like a spaghetti monster’s lair, take a breath and remember: pipes only go two ways—water in, water out. The pump’s manual will have a diagram that’s about as intuitive as a tax form, but squint hard enough and it’ll make sense.
Cutting pipes? Measure twice, cut once, and for the love of all things holy, don’t eyeball it. A hacksaw works, but a PVC cutter is like swapping a butter knife for a lightsaber. Dry-fit everything before gluing—because once that PVC cement sets, it’s more permanent than your ex’s grudge. Wrap those threaded connections with Teflon tape like you’re gift-wrapping a present for someone you actually like. Clockwise, not counterclockwise—unless you enjoy leaks and regret.
Wiring is where things get spicy. If the idea of matching colored wires makes you sweat, maybe pause and reconsider your life choices. But if you’ve swapped out a light fixture without electrocuting yourself, you’re golden. Follow the pump’s wiring diagram like it’s a treasure map, and for Pete’s sake, turn the power back off before touching anything.
Once everything’s hooked up, prime the pump (check the manual—some need water in the basket before firing up). Flip the switch and listen. A smooth hum is good. A grinding noise? Abort. A high-pitched whine? Something’s either wrong or your pump is auditioning for a horror movie.
Test the cleaner. If it’s zooming around like it’s on a caffeine high, congrats—you’ve just saved yourself a couple hundred bucks in labor. If it’s sluggish or not moving, double-check for air leaks, clogs, or that one pipe you forgot to glue.
Maintenance? Keep the pump basket clear of debris—because nobody wants their booster pump choking on a leaf. Lubricate the O-rings annually unless you enjoy the sound of dry rubber screaming. And if something goes wrong, don’t panic. Most issues are fixable with a five-minute Google search and a stubborn refusal to admit defeat.
Call a Pro: Worth It If Your Plumbing Skills Start and End With ‘Duct Tape Fixes Everything’
Look, there’s no shame in admitting that your DIY prowess peaks at reattaching a loose cabinet knob with chewing gum. If the thought of cutting PVC pipes makes you break out in hives, or if your idea of “tool organization” is a junk drawer full of mystery screws, then calling a pro isn’t just smart—it’s self-preservation.
Pros don’t just show up with tools; they bring the kind of confidence that comes from not having to Google “how to un-flood my backyard.” They’ll size up your pool setup in seconds, spot the weird quirk in your plumbing (like that one pipe that’s been jury-rigged since the Reagan administration), and install the booster pump without turning your equipment pad into a water feature.
Cost? Yeah, it’s more than doing it yourself, but weigh it against the hidden expenses of DIY disasters: the emergency trip to Home Depot, the “I definitely didn’t need stitches” bandage situation, or the sheer existential dread of realizing you glued a pipe backward. A pro gets it done in a couple hours, tests everything, and might even drop some knowledge bombs—like why your cleaner’s been sluggish or how to tweak the pressure for better performance.
Plus, many pool service companies offer warranties on their work. So if something goes sideways, they’ll fix it without you having to utter the phrase, “Well, it worked on YouTube.”
And let’s be honest—sometimes the best DIY move is knowing when to hand the wrench to someone who won’t cry using it.
Introduction:
Picture this: you’re lounging by your sparkling pool, margarita in hand, watching your pool cleaner glide effortlessly across the bottom like a Roomba with a vacation home. Life’s good. But then—plot twist—your cleaner starts moving slower than a DMV line on a Monday morning. The culprit? Weak suction. The fix? A booster pump for your pool cleaner, the unsung hero of hassle-free pool maintenance.
This isn’t some fancy gadget for the Elon Musks of the pool world. It’s for anyone who’s tired of playing “guess why the cleaner’s stuck” or secretly resenting their pool for being high-maintenance. We’ll debunk myths, break down installation (DIY or pro-style), and spill the tricks to keep your pump running smoother than a used-car salesman. So grab that drink, ditch the skimmer net, and let’s get your pool cleaner working harder than you do.
DIY It:** If you can handle a wrench and follow YouTube tutorials without crying, go for it
DIY It: If You Can Handle a Wrench and Follow YouTube Tutorials Without Crying, Go for It
Let’s be real—installing a booster pump for your pool cleaner isn’t rocket science, but it’s also not as simple as slapping on a Band-Aid. If you’ve ever successfully assembled IKEA furniture without ending up with “extra” screws, you’re already ahead of the game. The key here is patience, a little mechanical intuition, and the ability to follow instructions without throwing your phone across the yard in frustration.
First things first—gather your tools. You don’t need a full-on mechanic’s garage, but you’ll want the basics: an adjustable wrench, screwdrivers (flathead and Phillips), Teflon tape (because leaks are the enemy), and maybe a pair of pliers for good measure. Oh, and don’t forget the most important tool of all: your phone, loaded up with a trusty YouTube tutorial. There’s a reason why “how to install a pool booster pump” has thousands of views—people just like you have been there, done that, and lived to tell the tale.
Now, before you start twisting bolts like a mad scientist, shut off the power. This isn’t one of those “eh, I’ll be fine” moments. Messing with electricity while standing in water is how horror movies start. Flip the breaker, double-check with a voltage tester if you’re paranoid (good paranoia), and then proceed like a responsible adult.
Next up: location, location, location. Your booster pump needs to live near your existing pool pump but not so close that they’re fighting for space like siblings in the backseat of a car. Most setups place the booster pump right after the filter but before the return lines. If that sounds like gibberish, don’t sweat it—your pool’s plumbing probably has arrows or labels. Follow the water’s path, and you’ll figure it out.
Time to get hands-on. Disconnect the plumbing where the booster pump will go—expect some water spillage, so keep a towel handy (or embrace the splash like a kid at a water park). Dry-fit the pump first to make sure everything lines up. If the pipes are stubborn, a little wiggle or a gentle tap with a rubber mallet can work wonders. Just don’t go Hulk mode—PVC pipes aren’t fans of brute force.
Once everything’s aligned, it’s Teflon tape time. Wrap those threaded connections like you’re gift-wrapping a present for someone you actually like. Two or three layers should do the trick—enough to seal but not so much that the threads won’t catch. Screw everything back together, hand-tight first, then give it a gentle quarter-turn with the wrench. Over-tightening is a rookie mistake that leads to cracked fittings, and nobody wants to explain that to the spouse.
Now, the moment of truth: turn the power back on and fire it up. If your pump sounds like a jet engine, something’s wrong. If it’s humming like a content fridge, you’re golden. Check for leaks—if you see water where it shouldn’t be, shut it down and re-tape those threads. If it’s dry, congrats! You’ve just saved yourself a couple hundred bucks in handyman fees.
But wait—don’t toss the manual yet. Take five minutes to skim the maintenance section. Most booster pumps need occasional love, like checking the strainer basket for debris (leaves, bugs, the occasional pool toy casualty) and making sure the motor isn’t overheating. Set a reminder on your phone if you’re the forgetful type—your future self will thank you when the pump lasts twice as long.
Of course, DIY isn’t for everyone. If you’re the kind of person who considers “hammer” a universal tool, maybe call a pro. But if you’re up for the challenge, installing a booster pump is a solid weekend project that’ll make your pool cleaner work like it’s got a caffeine addiction. And hey, even if it takes a few tries, at least you’ll have a good story for the next backyard BBQ.
Call a Pro:** Worth it if your plumbing skills start and end with “duct tape fixes everything
Call a Pro: Worth It If Your Plumbing Skills Start and End With “Duct Tape Fixes Everything”
Let’s be real—some of us weren’t born with the “handyman gene.” If your idea of plumbing expertise involves wrapping duct tape around a leak and praying to the home improvement gods, then yeah, calling a pro for your booster pump for pool cleaner install isn’t just smart—it’s self-preservation. Because nothing ruins a summer faster than turning your backyard into an accidental water park.
Why DIY Might Be a Disaster Waiting to Happen
You know that friend who “totally knows how to fix cars” until their brake job turns into a runaway shopping cart situation? Plumbing’s the same way. One wrong twist, and suddenly your pool pump’s shooting water like a malfunctioning fountain at the Bellagio. Pros exist for a reason—they’ve made the mistakes so you don’t have to.
Signs You Should Not DIY This:– You think PVC glue is just “extra-strength Elmer’s.”- Your toolbox consists of a butter knife and optimism.- The phrase “water pressure” makes you sweat.
What a Pro Actually Does (That You Probably Won’t)
It’s not just about connecting pipes. A good pool tech will:- Diagnose your system like a mechanic checking under the hood—no guesswork.- Balance the flow so your cleaner doesn’t rocket around the pool like it’s auditioning for Fast & Furious.- Future-proof the setup with valves and unions so you’re not redoing it in six months.
Pro Move: They’ll also spot sketchy existing plumbing—like that one pipe held together by zip ties and hope.
The Cost: Cheaper Than You Think (Compared to Your Mistakes)
Sure, paying a pro stings upfront. But compare that to:- Flood damage from a blown fitting ($500+).- Replacing a fried pump because you wired it backward ($1,000+).- Emergency plumber rates when you panic-call at 8 PM ($300 just for them to show up).
Ballpark Prices for Pro Installation:
| Service | Average Cost |
|---|---|
| Basic booster pump install | $200–$500 |
| Full plumbing tweaks | $500–$1,200 |
| “Oh God, What Did I Do?” rescue | $150+/hour |
Hint: The middle option is cheaper than the last one.
How to Find a Pro Who Won’t Rip You Off
Not all pool techs are created equal. Avoid the guy who shows up in flip-flops with “I ♥ Plumbing” tattooed on his arm (unless he’s legit, which, hey, maybe).
Green Flags:✔ Licensed and insured (ask for proof—no shame).✔ Reviews mentioning “fixed my disaster” or “didn’t upsell me.”✔ Actually explains what they’re doing instead of mumbling about “flux capacitors.”
Red Flags:❌ “Pay cash for a discount.” (Translation: “I’m not liable for floods.”)❌ No written estimate. (Surprise bills are the worst kind of surprise.)❌ Uses the phrase “good enough” more than once.
What to Expect During the Install
A pro job should look boringly smooth:1. Shut off everything (water + power)—no cowboy electricians here.2. Measure twice, cut once—unlike your DIY attempt where the pipe ended up 2” too short.3. Pressure-test the system before declaring victory.
Pro Tip: Watch and ask questions. You’ll learn enough to handle basic maintenance later—without the trial-by-error trauma.
When Calling a Pro is Non-Negotiable
Some scenarios scream “put the wrench down and back away slowly”:- Your pool has old plumbing. (Galvanized pipes? Walk away.)- You’re adding a booster to a solar/heated system. More valves = more ways to mess up.- The pump location looks like a spaghetti junction of pipes. Pros speak “plumber” fluently.
The Peace-of-Price Tag
At the end of the day, paying a pro means:- No spending your weekend ankle-deep in water.- No explaining to your spouse why the patio’s now a pond.- Actually using your pool instead of nursing a plumbing hangover.
Bottom Line: If you’re the type who considers duct tape a permanent solution, save yourself the headache. A pro install costs less than the therapy you’ll need after a DIY gone wrong.